Imagine walking into your home one rainy afternoon and noticing a musty smell coming from the hallway. At first, you might ignore it, thinking it’s just the weather. But days later, you find discoloration on your walls or flooring. What’s going on? Moisture has likely crept in, and if it goes unchecked, it can cause serious damage. That’s where steps in like a silent detective, helping you find hidden water problems before they turn into full-blown disasters.
This powerful technique can help homeowners protect their homes from mold, rot, and structural damage. It’s not just for big companies or inspectors anymore. You, too, can understand and even apply basic knowledge to keep your home healthy.
What Is Moisture Mapping and Why Does It Matter?
Think of this process like an X-ray for your home. It helps you see water damage hiding beneath the surface. Instead of guessing where leaks or mold might be, it gives a clear view of problem areas.
This technique uses special tools like infrared cameras and moisture meters to scan walls, ceilings, floors, and even hidden areas. These tools create a visual “map” of where water is building up, even if you can’t see it with your eyes.
It matters because water damage often starts small but grows quickly. A slow leak behind a wall might take months to notice—but by then, you could be facing thousands in repairs. This technique catches these problems early.
Benefits of early moisture detection:
- Stops mold before it grows
- Protects wood, drywall, and insulation
- Prevents structural damage
- Saves on costly repairs
How Moisture Mapping Works: Tools and Techniques
Understanding how moisture mapping works can help you spot issues earlier and decide when to call for help. Here are the main tools professionals use:
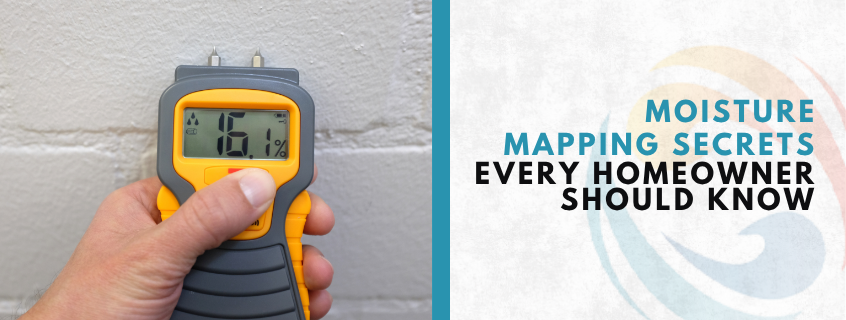
1. Moisture Meters:
These handheld devices measure the amount of water in materials like wood or drywall.
2. Infrared Thermal Cameras:
These cameras spot cold or wet spots by detecting changes in temperature, often the first sign of a water leak.
3. Hygrometers:
These measure humidity levels in the air. High humidity indoors can be a sign that water is collecting somewhere.
How moisture mapping is usually done:
- Inspect visible damage areas
- Use tools to scan all nearby walls and floors
- Record moisture levels in a grid pattern
- Analyze data to build a full moisture map of your home
Once the map is complete, you’ll know exactly where moisture is hiding—and what to do next.
Many homeowners wait too long before checking for moisture issues. You don’t need to see water on the floor to have a problem. Often, moisture hides where you least expect it.
Many homeowners wait too long before checking for moisture issues. You don’t need to see water on the floor to have a problem. Often, moisture hides where you least expect it.
Here are some clear signs you may need to do moisture mapping:
- Persistent musty odor: If a room smells damp no matter how much you clean, that’s a red flag.
- Paint bubbling or cracking: Moisture behind walls can push paint outward.
- Warped or sagging floors: Water weakens wood and other flooring materials.
- Unexplained mold spots: Even small mold patches might signal a deeper issue.
- Stains on ceilings or walls: Yellow or brown stains often mean past or current water leaks.
If you’ve recently experienced water damage—like flooding, pipe bursts, or a roof leak—moisture mapping should be your next step. For those in the area, scheduling professional help from reliable water damage restoration experts can make all the difference.
When to Use Moisture Mapping During Homeownership
Knowing when to use moisture mapping can help protect your investment. It’s not just for after a disaster—it can be a regular part of your home maintenance.
Smart times to use moisture mapping include:
- After heavy rain or flooding
- During home renovations
- When buying a new home
- If you suspect mold or leaks
- When making an insurance claim
Many home inspectors now use moisture mapping tools before approving a home purchase. It’s also common after major plumbing work or roof replacement.
Pro tip: If you live in a beachside area like Manhattan Beach, where humidity and salty air can sneak into walls, moisture mapping is especially helpful. Learn more about staying safe after damage with this Water Damage Restoration Manhattan Beach service.
What Moisture Mapping Can Reveal That You Can’t See
Even if your home looks fine on the surface, moisture mapping can uncover dangers hiding beneath:
List of what moisture mapping can reveal:
- Water trapped in insulation
- Moisture beneath floorboards
- Damp spots behind tile walls (especially in bathrooms)
- Roof leaks sprare eading through the attic insulation
- Hidden mold colonies
These issues don’t show up right away. But over time, they can cause real harm to your home’s safety and your family’s health.
Table: Hidden Moisture Dangers and Their Risks
| Hidden Moisture Source | Potential Risk |
| Under-sink leak | Mold, wood rot |
| Roof leak into attic | Insulation damage, ceiling collapse |
| Window seal failure | Mold around windows |
| Shower wall moisture | Structural wall damage |
| Crawl space condensation | Termite attraction, mold spread |
By using moisture mapping, you get ahead of these threats before they snowball into massive problems.
DIY Moisture Mapping Tips for Curious Homeowners
You don’t always need a professional to get started. Some tools for basic moisture mapping are affordable and easy to use.
Beginner tools you can try:
- Pinless moisture meters: Easy to use on walls, ceilings, and floors without leaving marks.
- Handheld thermal cameras: Entry-level models now connect to your smartphone.
- Digital hygrometers: Monitor room humidity in real-time.
Steps for simple DIY moisture mapping:
- Start by checking rooms with past leaks or signs of damage.
- Use your tools to scan in a grid pattern across surfaces.
- Record readings and mark spots with high moisture.
- If numbers keep rising, it’s time to call in the pros.
Remember, these tools can show you where the problem might be—but you’ll need expert help to confirm and repair deeper damage.
Moisture Mapping and Mold: A Critical Connection
Mold thrives where there’s moisture. That’s why moisture mapping is a key part of mold prevention. Without it, you might clean visible mold and miss the source entirely.
What makes moisture mapping important for mold control?
- It finds moisture behind walls where mold hides
- Prevents regrowth after remediation
- Helps professionals target the root cause
- Keeps your air clean and safe
Mold spreads fast in hidden areas. A single damp spot can cause spores to float through the air, leading to allergies, asthma, or worse.
If you’ve already had water damage or suspect mold, calling a team that specializes in full restoration services can help secure your home long-term.
Comparing Moisture Mapping with Other Leak Detection Methods
Homeowners often ask: Why not just look for leaks or check for visible damage?
Here’s how moisture mapping compares to other techniques:
Comparison List:
- Visual Inspection:
- Pros: Free and fast
- Cons: Misses hidden moisture
- Water Leak Detectors:
- Pros: Alerts for sudden leaks
- Cons: Doesn’t track the spread of water
- Thermal Imaging (part of moisture mapping):
- Pros: Finds cold, wet spots instantly
- Cons: Needs training to interpret results
- Moisture Mapping:
- Pros: Full-picture overview, great for prevention
- Cons: May require professional equipment
Moisture mapping gives you the whole story—not just a snapshot. That’s what makes it such a smart tool for homeowners who care about long-term protection.
Common Mistakes to Avoid in Moisture Mapping
Even with the right tools, there are mistakes homeowners make when trying moisture mapping themselves. Avoid these so you don’t end up with false results or missed problems.
Top mistakes to avoid:
- Skipping hidden spaces: Always check behind cabinets and under floors.
- Using the wrong tool: Not all moisture meters work on all surfaces.
- Misreading results: High humidity might not always mean water damage.
- Waiting too long: Small leaks grow fast—don’t delay.
To get accurate readings and a clear action plan, it’s always best to follow up with a professional moisture mapping inspection when in doubt.
Preventive Moisture Mapping for Long-Term Home Health
Just like annual physicals keep your body in shape, preventive moisture mapping keeps your home healthy. By making it a regular part of your maintenance, you stay ahead of costly repairs.
Places to inspect regularly:
- Bathroom walls and under sinks
- Kitchen baseboards
- Laundry rooms and water heaters
- Basement corners and crawlspaces
- Roof and attic insulation
Alphabetical Checklist for Preventive Moisture Mapping:
A. Attic spaces
B. Baseboards
C. Crawl spaces
D. Drywall
E. Exterior walls near sprinklers
F. Flooring near showers
G. Garage walls
H. HVAC units
I. Insulation
J. Joinery seams in plumbing
By checking these spots twice a year—especially after rainy seasons—you can make sure your home stays safe, strong, and dry.
Final Thoughts: Why Every Home Needs Moisture Mapping
Moisture mapping isn’t just a tool—it’s a secret weapon for homeowners who want to protect their investment. It helps you uncover problems early, avoid health risks, and prevent expensive repairs.
Whether you do it yourself with basic tools or call in experts, understanding how this process works gives you a major advantage. From spotting hidden leaks to keeping mold at bay, it’s a simple step that brings long-lasting peace of mind.
For those who want expert help, don’t wait until it’s too late. Consider reaching out to trusted restoration pros who can make sure your home stays safe and dry today, tomorrow, and beyond.
Frequently Asked Questions About Moisture Mapping
How do I know if I need moisture mapping in my home?
If you notice musty odors, warped flooring, or stains on walls and ceilings, you should consider moisture mapping. These can be early signs of hidden water damage that may worsen over time
Can I do moisture mapping myself or should I hire a professional?
You can start with DIY tools like moisture meters or thermal cameras, but for thorough and accurate results, hiring a professional is best. Experts have the equipment and experience to detect hidden moisture you might miss.
Is moisture mapping necessary if there’s no visible water damage?
Yes, moisture can build up behind walls or under floors without showing on the surface. Moisture mapping helps detect these hidden issues before they become serious problems.
Will moisture mapping help prevent mold in my house?
Absolutely—moisture mapping identifies damp areas where mold could grow. By locating and fixing these spots early, you can stop mold before it starts.
How often should we check for moisture in our home?
It’s smart to do moisture mapping once or twice a year, especially after storms or plumbing issues. Regular checks help protect your home from long-term damage.