Water damage can be a homeowner’s worst nightmare, especially when it manifests as dripping walls. Not only can these issues damage your home, but they can also lead to mold growth and other complications if left untreated. Today, we’ll embark on a journey through water damage restoration, specifically addressing dripping wall problems and how to effectively resolve them.
Imagine this: you arrive home after a long day at work, looking forward to a peaceful evening, only to discover water stains running down your living room wall. Panic sets in as you wonder how long this has been happening and what it will take to fix it. This scenario is all too common, and knowing what steps to take can make a world of difference.
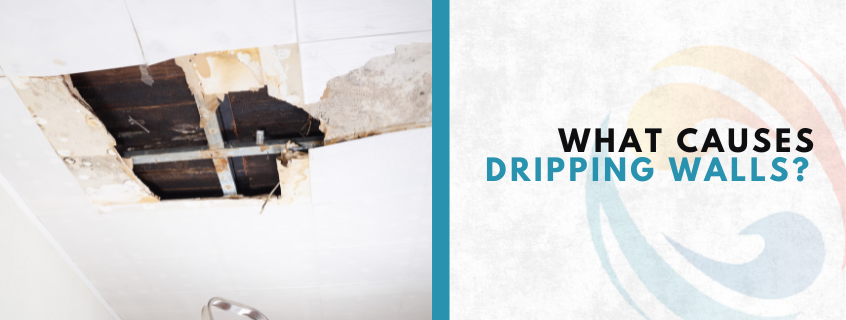
Understanding Dripping Wall Problems
Dripping wall problems occur due to excess moisture intrusion, which can be caused by various factors. Faulty plumbing, heavy rainfall, or even condensation can lead to water seeping into your walls. When this happens, it creates an environment ripe for issues like mold growth and structural damage, not to mention the inconvenience and stress it causes.
When confronting dripping wall problems, it’s crucial to identify the source of the water. For instance, a leaky roof might cause water to pool in your walls, or a burst pipe could lead to a waterfall of moisture invading your home. Understanding the culprit can streamline the restoration process.
Steps for Effective Water Damage Restoration
Now, let’s dive into the steps for effective water damage restoration, especially when it involves those pesky dripping walls. Follow these guidelines to tackle the issue like a pro:
- Assess the Damage:Start by inspecting the affected area. Look for signs of water damage, such as discoloration, bubbling paint, or mold. Document your findings with photos, which may be helpful if you file an insurance claim.
- Identify the Source:Is the problem caused by a leak, pipe burst, or roof issue? Inspect all potential sources. If it’s beyond your capabilities, don’t hesitate to call a professional. They have tools like moisture meters to locate hidden leaks.
- Stop the Water Flow:Once you’ve identified the source, the next step is to stop more water from entering your walls. This may involve shutting off the water supply or calling a plumber for repairs.
- Remove Damaged Materials:Remove any soaked drywall, insulation, or other materials that have been compromised. This step is essential to prevent the growth of mold and bacteria.
- Dry the Area:Use fans, dehumidifiers, and open windows to promote airflow and speed up the drying process. Ensuring that the area is completely dry is critical to prevent further issues.
- Clean and Disinfect:After everything is dry, clean the surfaces using a disinfectant to eliminate any potential mold spores. Products with anti-microbial properties can help enhance safety.
- Repair and Restore:Once the area is dry and cleaned, it’s time to repair the damage. This may involve replacing drywall, repainting, or even remodeling the affected space.
Common Customer Concerns
When dealing with dripping wall problems, homeowners often have specific questions. Let’s address a few common concerns surrounding water damage restoration.
How Much Will It Cost?
The cost of water damage restoration varies significantly based on the extent of the damage and the materials needed for repairs. For minor issues, homeowners might spend a few hundred dollars, while significant restorations could run into the thousands. It’s best to get multiple quotes from certified professionals.
Will My Insurance Cover the Damage?
Insurance can be tricky. It often depends on the cause of the water damage. For example, if it was caused by a sudden event like a pipe burst, it’s more likely to be covered. However, gradual water damage from long-term leaks may not be. Always check your policy and consult your insurance agent.
How Long Will Restoration Take?
The timeline for restoration can range from a day to several weeks. Factors like the extent of the damage, the drying time, and the repairs needed all play a role. An experienced restoration company can provide a more accurate estimate.
DIY vs. Professional Help
Deciding between a DIY approach and hiring a professional can sometimes be difficult. Here are some factors to consider:
- DIY Approach:
- Ideal for minor issues that can be managed with simple tools.
- Helps save money on labor costs.
- Involves a learning experience, which can be empowering.
- Professional Help:
- Best for extensive water damage that requires advanced tools and expertise.
- Professionals can complete work faster and more efficiently.
- Ensures all safety protocols are followed.
If you’re ever unsure, it’s wise to consult with a professional to evaluate the situation thoroughly.
Helpful Tips to Prevent Future Water Damage
Once you have resolved your dripping wall problems, it’s essential to adopt preventative measures to safeguard your home from future incidents. Consider implementing the following tips:
- Regular Inspections:
- Make it a habit to check your home regularly for signs of leaks or moisture. Pay close attention to areas around windows, doors, and pipes.
- Maintain Your Roof:
- Keep your roof in good condition by cleaning gutters and removing debris. Ensure that shingles are not missing or damaged and have a professional inspect your roof annually.
- Upgrade Plumbing:
- If your home has older plumbing, consider upgrading it. Modern piping materials are less prone to leaks and breaks, reducing your risk of water damage.
- Seal Cracks and Gaps:
- Check the exterior of your house for cracks and gaps, especially around windows and doors, and repair them promptly. This will help prevent unwanted water intrusion.
- Install Proper Drainage:
- Ensure that your yard is graded away from your home’s foundation. Consider installing downspouts and a drainage system to divert excess water away from your walls.
Real-World Example: A Homeowner’s Journey
Let’s take a look at a real-world scenario to illustrate the water damage restoration process. Meet Emma, a homeowner who experienced dripping wall problems after heavy rainfall.
Emma noticed damp spots on her living room wall one Friday evening. Concerned, she checked around the windows and under the sink but found nothing obvious. After some detective work, she discovered that the heavy rain had caused water to seep through a crack in her foundation.
Determined to restore her home, Emma followed the steps outlined above. She first stopped the water flow by diverting gutters, then removed the damaged drywall and insulation. Once everything was dry, she disinfected the area and repaired the walls.
Not only did she solve her immediate problem, but Emma also took the opportunity to reinforce her foundation and improved the drainage around her home. Her proactive steps ensured that her living room remained dry even through heavy storms.
Take Control of Water Damage
Dripping wall problems can be overwhelming, but with the right information and approach, homeowners can tackle these issues head-on. Whether through a DIY effort or by enlisting the help of professionals, understanding the process of water damage restoration can empower you to protect your home effectively.
At 770 Water Damage & Restoration, we are committed to assisting you with your water damage issues. Our team of experts is ready to provide swift and thorough water damage restoration services, making your home safe and dry once again. Remember, taking quick action when you spot the signs can save you time and money in the long run.
Stay alert, keep your space dry, and don’t hesitate to reach out for help if you’re facing challenges with dripping walls or other water damage concerns. Together, we can ensure your home remains a safe haven for you and your family.
FAQs
What causes dripping wall problems?
Dripping wall problems are often caused by plumbing leaks, roof leaks, or foundation issues. Regular inspections can help identify these issues early.
How can I identify water damage in my walls?
Look for discoloration, peeling paint, or mold. If you see any of these signs, act quickly to prevent further damage.
What is the water damage restoration process?
The restoration process includes assessing damage, stopping the moisture source, removing affected materials, drying, cleaning, and repairing the area.
Is water damage restoration covered by insurance?
Coverage depends on the damage cause. Sudden events like burst pipes are typically covered, while gradual leaks may not be.
How can I prevent future water damage?
Maintain plumbing, inspect your home regularly, and ensure proper drainage around your foundation to prevent future water damage.